The Most Deceiving (and Effective!) Exercise of All Time
This one movement trains your entire body for ultimate function, strength, and stability.
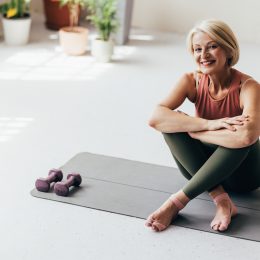
Pick up a weight and walk forward. That’s all there is to one of the very best exercises you can do: the carry.
This lift-and-walk movement builds total-body strength, improves posture, and even boosts grip strength, which research shows can be a better predictor of longevity than traditional health markers like blood pressure.
“For such a simple exercise, the list of benefits goes on and on,” says Ryan Campbell, a training specialist at Anytime Fitness of Southern Wisconsin. And he’s not the only one who thinks so.
“Carry exercises can help you develop core strength, which assists in keeping the back and spine healthy; increase arm and hand strength, which improves your ability to lift, carry, push, pull, and hold things; and strengthen the hips and legs for improved locomotion and direction change,” says Chris Kolba, a physical therapist at Ohio State University Wexner Medical Center.
They can even improve your gait, which is important since research shows a poor walking pattern puts stress on your joints and can increase risk for arthritis.
“Every step during a carry exercise requires the base leg and hip to stabilize,” Campbell explains. “This teaches people how to walk better by stabilizing with the musculature of the hips instead of using momentum to stay balanced. This can definitely help prevent falls.”
Finally, because carry exercises involve such a wide range of muscles, Kolba says, performing them, especially over long distances, is a good way to get your heart pumping and reap cardiovascular benefits too.
The practicality of these movements is hard to overstate: Every time you pick up your groceries and carry them across the store or house, you’re performing a carry. The same is true with carrying luggage through a crowded airport. But if you really want to reap the benefits, it’s best to make this functional movement a staple in your workout routine.
How to Add Carries to Your Workout
Carries integrate seamlessly into any workout. You can perform them as part of your warmup, as part of your main strength session, or as a finisher at the end of a session.
“Since their range of motion for the joints is small, they do not cause as much post-exercise muscle soreness compared to most strength-training exercises,” Campbell says. That means you can do them regularly, even every day, but Kolba recommends starting with two or three times per week.
As with all strength exercises, follow any instructions from your doctor, especially if you have a chronic condition, an injury, or balance issues. Start with a light weight, and focus on your form. As you feel able and confident, gradually increase the weight carried or the total distance you walk.
A good rule of thumb: Aim to feel like you’re working at a 7 on a scale of 1 to 10, with 10 being the hardest you can imagine exerting yourself. “If the exercise becomes easy,” Kolba says, “add some weight or walk a longer distance to keep feeling challenged.”
6 Carry Exercises to Get You Started
The carry variations below are organized from least to most challenging to help you pick the best option for your body and strength level. That said, even advanced exercisers should continue doing the more basic variations, Kolba says, as performing multiple types of carries allows for the most well-rounded benefits.
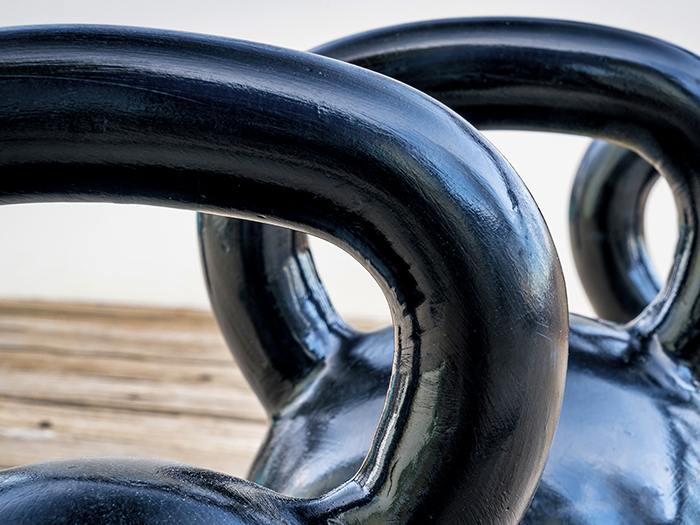
All of the following exercises are described using a kettlebell. That’s because with kettlebells, the weight hangs below the handle, making them ideal for mimicking how you carry things in real life. If you don’t have access to kettlebells, you can use dumbbells instead.
Ready to get carried away? Here’s how to perform each exercise.
Exercise #1: Farmer’s Carry
Grab a pair of kettlebells (or dumbbells), and let them hang naturally at arm’s length next to your sides, palms facing in. Walk forward for as long as you can (aim for 30 seconds), keeping an upright torso and not allowing the weight to dump into your low back. Imagine a string is connected to the top of your head and pulling you toward the ceiling.
If you can walk for longer than 60 seconds, try using a heavier weight.
Exercise #2: Suitcase Carry
This is the same movement as the farmer’s carry, except this time you’ll hold the weight in one hand at a time.
Grab one kettlebell (or dumbbell), and hold it like a suitcase, keeping your shoulders square and upright. Maintain that posture as you walk with the weight at your side—no leaning! Walk for five to 10 feet, then put it down, pick it up with your other hand, and walk back. Repeat two to three times.
Exercise #3: Double-Arm Rack Carry
The key to this carry variation is the racked position of the weights, which engages your upper-back muscles (to keep the weights stable) and also creates more of a cardio challenge.
Grab a kettlebell in each hand, and carefully raise them to your shoulders. Your wrists should be facing each other, and your elbows should be pointed straight down toward the floor. The weights should hang against the backs of your forearms as you stand tall with your core braced. (If you’re using dumbbells, keep them off your shoulders.) This is your starting position.
Maintain your posture as you walk forward as long as you can (aim for 30 seconds). Imagine a string is connected to the top of your head and pulling up. Carefully lower the weights to your sides and then the floor. If you can walk for longer than 60 seconds, try using a heavier weight.
Subscribe to our newsletter
It's quick and easy. You could be one of the 13 million people who are eligible.
Already a member? Click to discover our 15,000+ participating locations.
Follow Us
Exercise #4: Single-Arm Rack Carry
As you might’ve guessed, this carry variation is the same movement as above using only one weight at a time. By only holding one weight, your oblique muscles on the opposite side have to work harder to keep you upright.
Grab one kettlebell (or dumbbell), and bring it to a racked position, holding the weight at your shoulder with your elbow pointing straight down. (If you’re using a dumbbell, hold it above your shoulder.)
Keeping your shoulders square and upright, walk forward five to 10 feet. Carefully put the weight down, pick it up with your other hand, and walk back in a racked position. Repeat two to three times.
Exercise #5: Double-Arm Waiter Carry
This variation involves pressing the kettlebells overhead and holding them there as you walk. It is not recommended for anyone with back or shoulder issues. It’s always best to check with a fitness professional or physical therapist before trying this variation.
If it’s safe for you, start by holding a kettlebell (or dumbbell) in each hand and bringing them to a racked position at your shoulders. From here, extend your arms to press the kettlebells overhead. It may help to bend your knees a little at first for some extra oomph. Make sure your elbows are locked out and your shoulder blades are down, not shrugging up by your ears. This is your starting position.
Walk forward as long as you can (aim for 20 to 30 seconds), maintaining an upright posture and not allowing the weight to sink into your low back. Carefully lower the weights to your shoulders and then your sides before setting them on the floor.
Exercise #6: Single-Arm Waiter Carry
Just as with the double-arm waiter carry, this variation is not recommended for anyone with back or shoulder issues. If it’s safe for you, performing the waiter carry with one weight at a time is a great (challenging!) way to work on functional core strength and balance.
Grab a kettlebell (or dumbbell) in one hand, and bring it to your shoulder before pressing it straight overhead. Remember to keep your shoulder back and down. Once you’re comfortable in your position and upright in your posture, begin to walk forward, keeping the weight directly above your shoulder—don’t allow it to wander behind you!
Walk for five to 10 feet, then carefully lower the weight down, pick it up with your other hand, raise it overhead, and walk back. Repeat two to three times.
Take Your Favorite SilverSneakers Classes Online!
SilverSneakers members can access live fitness classes and wellness workshops through SilverSneakers LIVE. See the latest schedule and RSVP for classes here.
Not a member? If you have a Medicare Plan, it may include SilverSneakers—at no additional cost. Check your eligibility instantly here.