Yoga for Beginners: Tree Pose
Improve balance and stability on the mat and in everyday life with this fundamental pose.
Think about a tree in nature. How does it stay grounded when the wind blows? Receive water and nourishment? Move gracefully through the seasons?
The answer is its strong roots. And that explains why we practice tree pose in yoga: to establish our roots and better manage life’s ups and downs.
“We practice tree pose to work on balance, stability, and breathing despite life’s wobbles,” says Terecita “Ti” Blair, the 2017 SilverSneakers Instructor of the Year. “With practice, we can learn to stabilize, even when things get windy in our worlds.”
Use her guide below to find your roots, strengthen your core, and learn to embrace a little wobble. If you’d like, you can even do tree pose seated.
As always, safety is key. The exercises here may be different or more advanced than those you’ll experience in a SilverSneakers class. If you have a chronic condition (including osteoporosis), an injury, or balance issues, talk to your doctor about how you can exercise safely.
Step #1: Place Feet Under Your Hips
Stand with your feet about shoulder-width apart, knees slightly bent. Roll your shoulders up, back, and down. Pause to feel your strength here, making sure you have equal weight in each foot and that you’re breathing to protect your back.
Step #2: Move One Foot to the Side and Lift Your Heel
Move your left foot out to the side a few inches, allowing your toes to point out about 45 degrees. When you’re ready, lift your left heel so that you’re balancing on one leg. Continue breathing here for as long as you’d like.
Step #3: Bring Your Foot In
When you feel ready, bring your left foot in to meet your right so it’s like a kickstand. Your left knee remains turned out to the side. Root down into your feet, and place your hands on your hips.
Step #4: Grow Your Tree
When you feel ready, extend your hands overhead like tree branches. Breathe here for three to 10 breaths. Reverse the movement to return to mountain pose, then repeat on the opposite side.
Step #5: Make It Your Own
To make this pose easier, practice seated tree: Sit tall with toes, knees, and hips facing forward, feet planted on the floor. Turn your left foot out to the side and lift the heel. Play with drawing your left foot in toward your right foot. Add in arms variations (see below), and breathe here for three to 10 breaths. Reverse the movement to return to seated mountain, then repeat on the opposite side.
Subscribe to our newsletter
It's quick and easy. You could be one of the 13 million people who are eligible.
Already a member? Click to discover our 15,000+ participating locations.
Follow Us
To make it harder, try adding one of these arm variations:
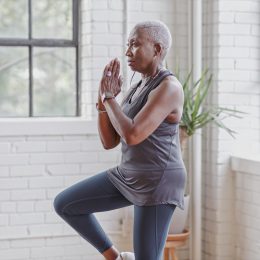
- Bring your hands together in front of your heart center.
- Reach your arms straight out in front of you with palms facing each other.
- Lift your arms up toward the sky, growing your branches. For even more of a challenge, gaze up at the ceiling, and try moving your arms like branches in the wind.
Or add a leg variation: Lift your raised foot to rest on your inner calf or inner thigh of your standing leg. Just avoid putting your foot on the knee or ankle joints of your standing leg.
Check Your SilverSneakers Eligibility Instantly
SilverSneakers members can go to thousands of gyms and fitness locations across the nation, plus take exercise classes designed for seniors and led by supportive instructors. If you have a Medicare Plan, it may include SilverSneakers—at no additional cost. Check your eligibility instantly here.
Already a member? Get your SilverSneakers member ID and exclusive fitness content by logging in to or creating your online account here.