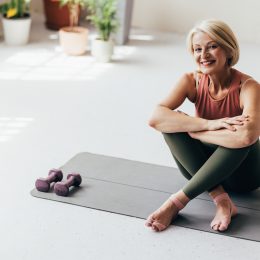
6 Best Yoga Poses to Strengthen Your Bones
Add these exercises to your routine to help protect against osteoporosis.
You know that walking and strength training each hold keys to a strong skeleton. But emerging research shows that yoga—yes, the mind-calming, tension-relieving, flexibility-defying practice—helps build strong bones too.
In fact, just 12 minutes of daily yoga helped improve bone mineral density in older adults with osteoporosis, according to a study in Topics in Geriatric Rehabilitation. Why this matters: Osteoporosis is a condition that zaps your bone strength—and leaves you vulnerable to falls and fractures.
In addition to improving bone density, yoga enhances posture, balance, coordination, and range of motion. As an added bonus, no serious yoga-related injuries were reported in the study.
“Deliberate, slow, careful yoga can be safe and beneficial for people with osteoporosis,” says Sage Rountree, a yoga instructor in Chapel Hill, North Carolina, and coauthor of Lifelong Yoga. “Bones need positive stress to maintain or build their density, and yoga can contribute this positive stress in mindful and gentle ways.”
Using your own bodyweight and connective tissues, such as your muscles and fascia, to support you in various yoga poses puts gentle pressure on your bones, adds Sandra “Sam” Sather, a yoga instructor who specializes in working with older adults in Chapel Hill. This kind of weight-bearing movement, she says, ultimately helps you stimulate bone-making cells to lay down new, healthy bone.
And while you’re building your bones, you’re also strengthening the muscles that shore up your skeleton. Additionally, the fascia in the body that help support the sturdiness of our posture gets healthy stress from many yoga poses when done within your range of motion.
Translation: “The bones and connective tissues in our body are getting stressed in a healthy way by the poses that you’re holding in yoga,” Sather says.
Be Picky About Your Poses
There’s a caveat: You have to be choosy about the movements—especially if you’ve been diagnosed with osteoporosis or its precursor, osteopenia. Strike the wrong pose, and you could set yourself up for injury.
The best yoga poses for bone strength include balance and strengthening moves, and any pose that encourages you to sit or stand tall, as opposed to flexing the spine and rounding forward, Sather says.
Balance and strengthening poses help prevent falls. Meanwhile, spine-lengthening poses counteract that hunched-over posture so many of us develop as we age and help reduce the likelihood of spinal fracture caused by osteoporosis. A win-win!
The worst yoga poses for people with low bone density are those that stress high-risk fracture spots. This includes poses that load the front of the backbone—such as seated or standing forward bends—and those that put deep pressure into the hip sockets, such as deep lunges or hip stretches.
The most dangerous of the bunch are poses that have you flex and rotate your spine together, such as a standing wide-leg forward bend and twist pose, Sather says.
Also, don’t try to pull yourself past your end range of motion. “Anything where you’re pulling past your range is not a good thing if you have osteoporosis,” Sather says.
How to Get Started with Yoga
There are many types of yoga, and it can be adapted for your needs. As always, safety is key. Talk to your doctor about safe exercise if you have osteoporosis or osteopenia, or if you have a chronic condition, an injury, or balance issues. If you have bone loss, your doctor may want to limit certain movements or avoid certain poses altogether.
Once you have any instructions from your doctor, try any of the bone-building yoga poses below that are gentle enough to add to your daily practice. You’ll want clear space and a mat, and perhaps a sturdy chair or yoga block. You can also perform these moves with or without shoes on, whichever is safest and most comfortable for you.
Prefer a class? With SilverSneakers Yoga, you’ll move through a series of yoga poses and breathing exercises, and you’ll have a chair available for support. Plus, instructors are trained to work with older adults, including those with health conditions. Let them know about your concerns, and they can help you modify movements as needed.
Bone-Building Pose #1: Bent-Arm Plank
Hold the pose for 3 to 12 breaths
How to do it: Lie on your stomach with your elbows directly underneath your shoulders and forearms flat on the floor. Focus your eyes between your hands. Your legs should be resting behind you, knees hip-width apart (or slightly farther apart for extra balance).
From here, inhale, tuck your toes under, and lift your head so it’s in line with your back.
As you exhale, lift your body toward the ceiling until your it forms a straight line from head to ankles, and squeeze your upper back, core, and glutes. Keep your shoulders down and away from your ears, and make sure your lower back doesn’t sag toward the floor. Hold the pose for three to 12 breaths.
Make it easier: If getting on the floor is difficult, use a sturdy bench to elevate your hands.
Bone-Building Pose #2: Downward-Facing Dog
Hold the pose for 3 to 12 breaths
How to do it: Get down on all fours with your knees underneath your hips and your hands slightly in front of your shoulders. Make sure your palms have good contact with the floor, and engage your belly.
Press into the floor with your hands and feet, gently drawing your hips toward the ceiling so your body forms an upside-down V. Engage your back, and keep your shoulders down and away from your ears. Feel the stretch in your legs, but let your knees bend and heels stay lifted as much as you need to. Breathe here for three to 12 breaths, then gently return to the starting position.
Make it easier: Try downward-facing dog with chair. Place your hands on the back of a sturdy chair or bench. Hinge at your hips, and take a few steps back, straightening your back and legs.
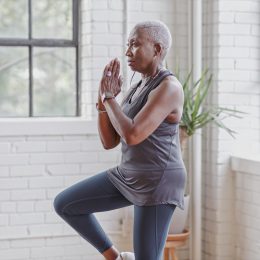
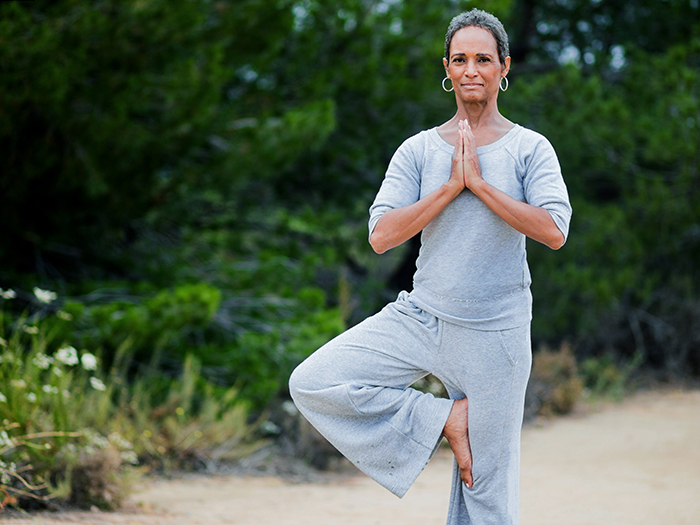
Bone-Building Pose #3: Tree
Hold the pose for 3 to 12 breaths per side
How to do it: Stand tall with your feet hip-width apart, and your toes, knees, and hips facing forward. Roll your shoulders up, back, and down. Draw your belly in for support, and lift your chest.
Shift your weight to your right foot. Turn your left toes slightly out, lift your heel, and draw it toward your right foot like a kickstand. Make sure not to put pressure on the ankle joint itself.
You can bring your palms together in front of your chest or hold on to a wall, counter, or sturdy chair for support. Stand tall, and breathe for three to 12 breaths. Return to standing on both feet, and repeat on the other side.
Make it harder: Place the sole of your lifted foot inside the calf or thigh of your standing leg. Make sure not to put pressure on the knee joint.
Subscribe to our newsletter
It's quick and easy. You could be one of the 13 million people who are eligible.
Already a member? Click to discover our 15,000+ participating locations.
Follow Us
Bone-Building Pose #4: Warrior 2
Hold the pose for 3 to 12 breaths per side
How to do it: Stand with your feet wide apart, and turn your left toes out toward the left. Bend your left knee about 90 degrees, keeping your knee above your ankle and heel. Keep the outer edge of your right (back) foot firmly on the floor. Engage your belly.
Extend your arms out at your sides with your palms facing down, and gaze out over the middle fingertips of your left hand. Breathe here for three to 12 breaths, then gently return to the starting position. Repeat on the other side.
Make it easier: If you need more support, place your hands on your hips, and simply gaze to the side.
Bone-Building Pose #5: Warrior 3
Hold the pose for 3 to 12 breaths
How to do it: Stand with your left foot forward and right leg back in a lunge. Extend your arms above your head. Roll your shoulders up, back, and down. Engage the low belly as you lift your chest.
Lift your right foot behind you, and then slowly tip your torso forward, allowing your right leg to extend as you do. Go as far as you comfortably can, and gradually work toward making your back leg and torso parallel with the floor, forming a line from your head to your right heel. Keep your right foot flexed, toes pointing to the floor. Find a focal point to help you balance, and breathe here for three to 12 breaths. Repeat on the opposite side.
Make it easier: Place your hands on the wall or sturdy surface for support, or keep your back toes on the floor.
Bone-Building Pose #6: Standing Half Moon
Hold the pose for 3 to 12 breaths
How to do it: Place a yoga block or sturdy chair within reach of your right ride. Stand with your feet hip-width apart, knees and hips facing forward. Roll your shoulders up, back, and down. Separate your feet two to three feet apart, and place your hands on your hips. Slowly start to tip your weight into your right leg, reaching for the yoga block or chair with your right hand and keeping your left leg straight with foot flexed.
Keep tipping, allowing your left leg to lift parallel to the floor or as high as you comfortably can. You can keep your left hand on your hip or lift it toward the sky. Breathe here for three to 12 breaths. Slowly reverse the movement. Repeat on the other side.
Make it harder: Perform the move without yoga block or chair for support.
Take Your Favorite SilverSneakers Classes Online!
SilverSneakers members can access live fitness classes and wellness workshops through SilverSneakers LIVE. See the latest schedule and RSVP for classes here.
Not a member? If you have a Medicare Plan, it may include SilverSneakers—at no additional cost. Check your eligibility instantly here.